|
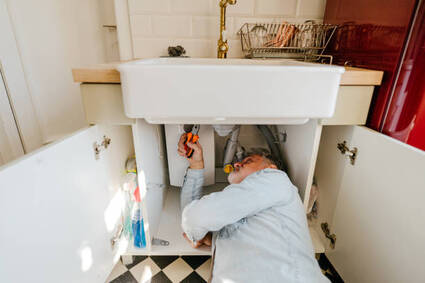
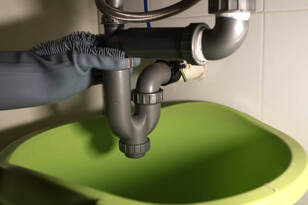
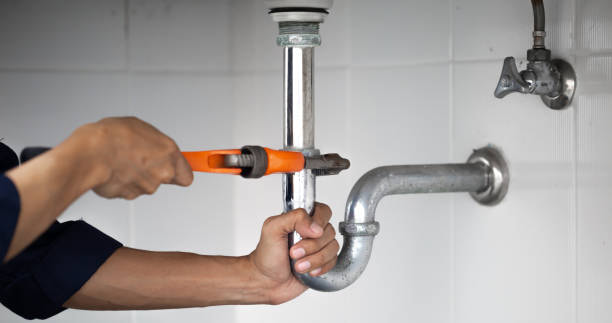
Pipes for a kitchen sink. Do you have leaks in the drain pipes beneath your kitchen sink? Or should I clear the clog in the kitchen sink? It's time to discard that bucket that keeps dripping. Tightening the joints and straightening the pipe can stop certain leaks. However, changing your under-sink plumbing is the solution if your stripped nuts won't tighten and your old washers won't seal because they're too stiff or warped. It might not be as difficult as it sounds. Installing a new drain assembly is a sensible and dependable solution, particularly if your current pipes are outdated, as plastic pipe is reasonably priced and quite simple to install. Tools Required for Repairing Kitchen Sink PipesThe following are the instruments needed for the project: a hacksaw, a "4-in-1" screwdriver, pliers, "slip joint" pliers, a level, and a tape measure. It may be necessary to use additional tools based on the kind of issues you run across. The following supplies are needed for the project: PVC waste arm, rubber washer, plumber's putty, cardboard washer, basket strainer, and locknut. These items are covered in more detail later in the article, but the parts you'll need for a new drain assembly should be available in a kit at any hardware shop for less than $20 to $30. Replace Kitchen Sink Pipes(1): Disassemble the Old DrainTo remove the strainer, which is probably the source of the leak, disassemble the current drain assembly. The strainer is visible in the image below as the black area directly beneath the sink's white bottom. As indicated, turn the slip nuts counterclockwise. Note that in order to prevent the pipes from rotating, you must use the second set of pliers that are clamped or held onto the pipe part below the wrench displayed. The entire drain pipe assembly is not what you want to turn—just the slide nut. After completely unscrewing the slide nuts, lower the pipe assembly and take it out. Plumber's putty, placed between the strainer's top flange and the kitchen sink's drain hole, serves as the main seal surrounding a basket strainer. However, this seal is temporary. It may become harder, shrink, or crack with time. Tightening the locknut can occasionally be used to stop a leak. But a fresh application of putty is frequently the sole remedy. The Most Difficult SectionUnscrewing the old locknut on the underside of the sink is the most difficult step of removing the strainer. The strainer is secured in place by means of this locknut. If you are fortunate enough to have a "third hand," you can have your assistant insert pliers into the holes in the strainer from above and use a screwdriver to insert between the pliers' two handles to prevent the strainer from turning while you attempt to release the locknut below. Mineral deposits or rust frequently "weld" or seal this locknut in place. The term "spud wrench" or "locknut wrench" refers to a unique type of wrench made specifically for use with locknuts. Large slip-joint pliers with a 3-1/2-inch jaw opening will also function, and you can utilize them for further tasks afterwards. The locknut may not budge no matter what tool you try. The only thing to do in that situation is to give the locknut a single, clean cut using a hacksaw blade. It's nearly hard to accomplish this without severing the strainer threads, thus a new strainer is obviously required. (2): Basket Strainer AssemblyInstalling the new strainer assembly now requires plumber's putty, a new locknut, rubber, and cardboard washers. After dropping the strainer in from above the sink, fill the hole around the perimeter with plumber's putty between the top of your sink and the strainer's flange. Screw the locknut into place, making sure to place the cardboard and rubber washers between the top of the locknut and the underside of the sink. Make sure to remove any leftover plumber's putty that could have escaped around the strainer's lip. (3): Attach Drain pipe assembly tailpiece to the to StrainerUsing the tailpiece washer in between the strainer's bottom and the tailpiece pipe, attach the tailpiece to the basket strainer. Don't tighten it all the way though, as you'll need to take it off later to trim it. Either a side outlet assembly or a center outlet assembly could be present. You can get the parts needed for either setup at your neighborhood hardware store, depending on which one you have. The majority of the necessary components should be included in the kits for either the side outlet assemblies or the center outlet assemblies (where the trap is located beneath the center of the sink). However, you might also require the following extras, which are stated below:
Be aware that you will need to cut the waste arm, maybe the trap arm, and both tailpieces of the new PVC pipe. The best tool is a fine-tooth hacksaw. When in Doubt...Mark and cut the pipes a little bit longer when in doubt. Cutting twice is preferable to cutting too short and needing to make a second trip to the hardware shop. Remember to tuck in the tailpiece washers. Cone washers are needed for other joints. The ground joint at the trap is the only one without a washer. Once more, all may be seen by clicking the above link. Till the entire assembly is finished, assemble everything loosely. Next, tighten each and every slip nut. It is necessary to hand tighten the slip nuts. However, after testing the rebuilt assembly, if any joints leak, use the slip-joint pliers to tighten them just a bit further. InstallationIt could be necessary to replace the adapter on the waste drainpipe and join the PVC pipe and steel drainpipe with a rubber coupler. The steel drainpipe and PVC pipe are joined by a rubber coupler. There should now be an adaptor attached to the end of the existing drainpipe that emerges from the wall. This adapter ought to function similarly to the other joints in your drain assembly and have a washer and slip nut. You should not experience any issues if your drainpipe is made of plastic. However, if your drainpipe is made of old galvanized steel, you may have corrosion that makes it very impossible to release and retighten the slip nut. You will need to avoid these dated discussions if that is the case. If you can, unscrew the old slip nut. If not, use a hacksaw to cut it off, being careful not to cut into the threads of the drainpipe too deeply. After that, you'll need to buy cement, a rubber transition coupler (similar to an automobile radiator hose coupler/connection), a spare piece of plastic pipe, and a plastic trap adaptor. PVC (white) or ABS (black) pipes and adapters are available; it's crucial to use the appropriate cement for the type of plastic (PVC also needs "purple primer"). Attach the adaptor to a 4-inch straight pipe using cement, and then use the rubber stopper to connect the plastic pipe to the old metal pipe. (4): Check for Leaks in the New Assembly After You're DoneReplacing the pipes in your kitchen sink could provide challenges. Never forget that AC Repair Burke Plumbing, Heating, and Air Conditioner is here to assist you at all times. Contact us or give us a call at 703 721 4847. We would be happy to visit your house and be of assistance!
0 Comments
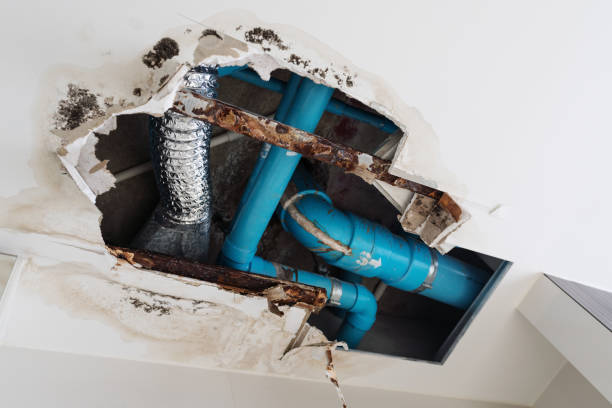
Pipes are used in both industry and home for a variety of reasons. While leaking pipes may be inconvenient, they have the potential to do serious harm if left unattended. While you wait for an pluming expert to come and fix the leak, you can take a few quick steps to minimize the damage. In this article we learn about how to fix a leaking pipe joint? While you wait for expert repairs, you can use the following temporary solutions for leaky pipes: (1): Apply the ClampPipe repair clamps provide a rapid and effective way to fix leaks by stopping leaky or burst pipes. A broken or leaky pipe joint can often be temporarily repaired with clamps. Usually, they are made up of a metal sleeve that is fitted over the surface of the leaky pipe and has a flexible rubber cushion inside to seal the leak. How to apply it: With the rubber cushion covering the pipe, position the clamp over the problem area. To stop water from seeping out of the pipe, plug the leak and create a tight seal by tightening the screws holding the repair clamp in place. (2): Use a Epoxy PuttyThe ideal adhesive for long-term repairs of pricey or challenging-to-remove things is epoxy putty. One of those things that epoxy putty can be used to swiftly and successfully remedy is a leaky pipe. It's a moldable material that solidifies in the presence of water. Epoxy putty has a moldable consistency akin to clay and is made up of two substances: a resin and a hardener. Because of its consistency, epoxy putty can be used to repair holes or cracks by gently pressing the glue into the affected area. To temporarily fix pipe leaks or gaps in cabinets, tiles, or brickwork, this putty forms a waterproof seal. It can also seal off non-ferrous metals such as brass, copper, and other plumbing components. To use, just cover the leak with putty and let it dry for a few hours. After the putty dries, it will form a strong, waterproof seal, halting the leak before it gets worse. (3): Apply Plumber's TapePatching up a leaky pipe with tape? Yes, it is feasible, despite the fact that it could seem impossible! However that's because this isn't your typical tape. Plumber's tape, sometimes referred to as "Teflon tape," is useful for waterproofing and sealing threaded pipe joints. Plumber's tape is a quick and simple way to seal leaks in your pipes. Simply pull the tape snuggly around the joint after wrapping it tightly. The impermeable seal of the tape will prevent the leak from getting worse. (4): Use the Rubber HoseIf the leak is too big to be contained with a clamp or putty, a rubber hose can be used to temporarily stop it. Cut a piece of rubber hose to a length slightly longer than the leak, wrap it around, and secure it with a clamp. By doing this, the leak will be fully sealed and prevented from spreading. (5): Cut off the Water SupplyThe best course of action is to cut off the water supply to your home or establishment if the leak happens. This holds true whether your pipes are used for oil or gas. This will prevent the leak from getting worse and buy you some time to get the necessary repairs done by an expert. Important LearningIt's important to keep in mind that these temporary adjustments are all that these leaking pipe quick fixes can do to lessen the damage caused by a leaky pipe. To stop additional damage, the leak needs to be addressed by a professional as soon as feasible. A qualified plumber can evaluate the issue and carry out the required fixes to stop the leak from happening again.
Our hot water heaters aren't put through much stress. All we ask is that they supply us with hot water for showers, baths, laundry, and cleaning dishes. Even the most well-maintained water heater will eventually experience problems. The pilot light in your gas or propane water heater is probably out of service if it's not providing you with hot water. In this article, we discuss about water heater pilot won't light. There are a few things you can attempt if you discover that your pilot light has gone out. Try reigniting it first; it might be all that's needed to solve your issue. Should the pilot fail to ignite or burn out quickly, there might be a more significant problem with your thermocouple or another part. You might need to contact a licensed plumber if your tankless water heater (or the hot water heater) is giving you serious or persistent problems. We are honored to be the best water heater repair company in Indianapolis, at AC Repair Burke. We invite you to call us if you encounter a pilot that is unlit while you're in the vicinity. Replaced the ThermocoupleIt can be annoying to discover that your pilot light won't remain lit, but fortunately, there's typically a rather straightforward answer. The most frequent reason why a pilot light won't ignite is almost always a thermocouple failure. The water heater has a built-in safety feature called a thermocouple. It permits gas to flow to the burner when it detects the pilot's heat. The pilot won't stay lit if the thermocouple malfunctions since it will cut off the gas to the burner and the pilot light. The thermocouple can usually be replaced in an hour and is a fairly straightforward process. This is one of the easiest water heater issues to fix, and a knowledgeable plumber can get your unit operating again quickly. Major Reasons for Water Heater Pilot won't LightA pilot light that won't stay lit most likely has a faulty thermocouple, but there are a few additional possibilities as well. Residual Gas Trapped in Water HeaterWe advise leaving your pilot out for five to ten minutes in order to allow any remaining gas to exit the device. It's not always necessary to shut off the gas valve. Simply check that your pilot light's control knob is in the OFF position. Give it a few minutes to settle before attempting to relight it. Problem with your Automatic LighterThe automated igniters included in most modern water heaters are akin to those found in gas grills. The button itself may eventually wear out and stop functioning, in which case a replacement will be necessary. You might still be able to light your pilot light using a match or cigarette lighter if the automated igniter isn't sparking. There is Blockage in your Pilot TubeOne more possible issue? You have a clogged pilot tube. This is the tiny tube that supplies the gas required to light and maintain your pilot flame. This tube could fill with trash over time. Using a needle or a little piece of wire, cleaning up the tube is typically rather simple. Age of your Water HeaterLastly, please remember that the majority of water heaters only survive ten to fifteen years. It might be more cost-effective to replace your heater rather than spend money on repairs if it is already past its prime. We are always pleased to provide an installation quote for tankless water heaters. Frequently Asked Questions (FAQ's)Why won't my pilot light come on my water heater?A clogged pilot tube is frequently the cause of an inability to ignite your pilot light. This little metal tube provides the gas required to light the pilot and maintain it burning. Debris frequently clogs the pilot tube, which stops gas from getting to the pilot light. Why is my gas water heater not igniting?The first thing to do when a gas water heater won't ignite is to make sure the gas pressure to the water heater is sufficient. The thermocouple/thermopile assembly would then be examined. We would next examine the gas control valve to determine if it was malfunctioning after verifying that. Can you manually light a water heater with electronic pilot?Today's water heaters rarely have standing pilots anymore. To light the gas, they use an electrical ignition device. Never try to manually start an electrical ignition system by hand.
|
AuthorWrite something about yourself. No need to be fancy, just an overview. Archives
June 2024
Categories |
- Home
-
Services
- Residential HVAC >
-
Commercial HVAC
>
- Professional Commercial AC Services
- Professional Apartment AC Services
- Commercial HVAC Installations
- Commercial HVAC Services
- Commercial Plumbing Services
- Commercial Water Heater Services
- Commercial Refrigeration Services
- Commercial AC and Furnace Services
- Commercial AC Pump Services
- Commercial Rooftop Unit Services
- Commercial Duct Cleaning Services
- Commercial Heating Preventive Maintenance
- About Us
- Near Me
- FAQ'S
- Contact Us
- Free Estimate
- Resources
- Blog
Local Service AreasHours of Operation
Monday 9:00 AM - 5:00 PM
Tuesday 9:00 AM - 5:00 PM Wednesday 9:00 AM - 5:00 PM Thursday 9:00 AM - 5:00 PM Friday 9:00 AM - 5:00 PM Saturday 9:00 AM - 5:00 PM |
Navigation |
Services |
Contact us |
Terms of service | Privacy Policy | Sitemap

 RSS Feed
